
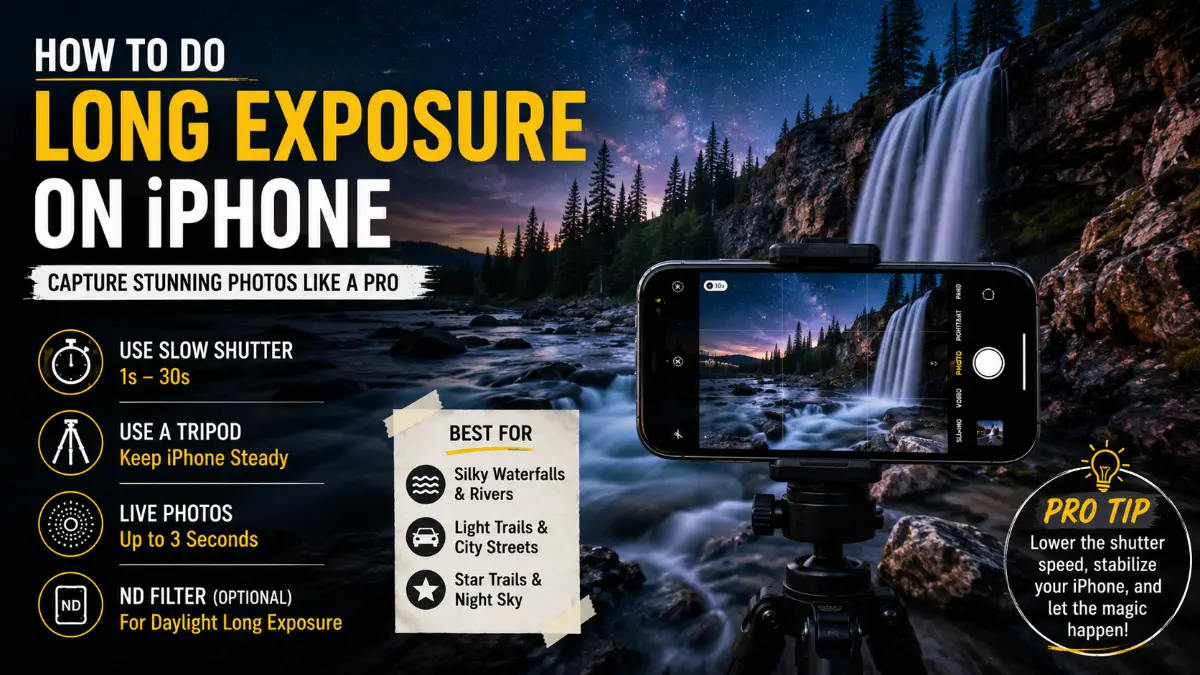
Learning how to do long exposure on iphone is easier than it sounds. For the simplest method, you do not need a DSLR, manual shutter controls, or even a third-party app. You can capture a Live Photo with the iPhone Camera app and then apply Apple’s Long Exposure effect in Photos to blur moving water, people, traffic, and other motion.
That native method is only one option, however. Night mode can create multi-second low-light captures on supported iPhones, while dedicated camera apps provide more control when you want stronger light trails, smoother water, or longer computational exposures. This guide explains each method, when to use it, and how to avoid the most common mistakes.
How to Create a Long Exposure on iPhone
For most beginners, the easiest way is:
- Open the Camera app.
- Select Photo mode.
- Turn on Live Photos.
- Keep the iPhone as steady as possible.
- Photograph a scene containing motion.
- Open the image in Photos.
- Tap the Live control near the top of the photo.
- Select Long Exposure.
Apple’s current documentation confirms that a Live Photo records approximately 1.5 seconds before and 1.5 seconds after the shutter is pressed. The Long Exposure option then applies an effect that blurs motion across that Live Photo rather than giving you conventional manual shutter-speed control. That makes this method excellent for experimenting with waterfalls, fountains, waves, moving pedestrians, and similar subjects.
The easiest method: how to do long exposure on iphone with Live Photos
The built-in Live Photos method is the best starting point because it requires no additional software. It is important to understand what the iPhone is doing, though. The Long Exposure option is a computational effect applied to the motion recorded in a Live Photo. It is not the same process as setting a traditional camera’s mechanical or electronic shutter to remain open for several seconds. Apple specifically describes the effect as simulating a DSLR-like long exposure by blurring motion.
Step 1: Turn on Live Photos
Open the Camera app and make sure you are using Photo mode. Depending on your iPhone and iOS interface, you may need to open the Camera controls before accessing the Live Photo control. Make sure Live Photos is enabled before taking the picture. Apple says Live Photos records approximately three seconds of activity in total: 1.5 seconds before and 1.5 seconds after the picture is taken. You therefore need Live Photos enabled during capture. Taking an ordinary still photo first and turning on Live Photos afterward will not create the missing motion frames.
Also Read: Long Exposure iPhone Guide: How to Capture Motion, Waterfalls, and Light Trails
Step 2: Choose a subject that actually moves
The effect becomes visible because something changes position during the Live Photo.
Good beginner subjects include:
- Waterfalls
- Streams
- Fountains
- Ocean waves
- Moving people
- Passing bicycles
- Traffic
- Spinning amusement rides
- Moving clouds when their motion is noticeable
A completely static landscape will normally show little difference because there is no significant movement to blur.
Step 3: Keep the iPhone steady
Hold the iPhone as still as possible while the Live Photo is being recorded. The goal is to keep buildings, rocks, trees, bridges, and other stationary objects sharp while allowing the moving part of the scene to blur. If the entire phone moves, the effect can soften both the subject and the background.
For better stability:
- Hold the phone with both hands.
- Keep your elbows close to your body.
- Lean against a wall or railing if available.
- Rest the phone on a stable surface.
- Use a tripod when you want maximum consistency.
- Avoid pressing the shutter aggressively.
Apple also recommends holding the device still when taking Live Photos.
Step 4: Capture the Live Photo
Compose the scene and press the shutter. Continue holding the phone steady immediately after pressing it. Because Live Photos record activity surrounding the shutter moment, moving the phone too quickly after taking the picture can affect the available motion sequence. For flowing water, try to include a sharp stationary reference such as rocks, a bridge, or the riverbank. The contrast between a sharp environment and blurred water helps make the long-exposure look convincing.
Step 5: Apply the Long Exposure effect
Open the captured image in the Photos app. Tap the Live Photo control near the top of the screen, then choose:
Long Exposure
Apple currently lists Long Exposure alongside other Live Photo effects such as Loop and Bounce. Photos processes the recorded motion and creates the blurred-motion appearance automatically. You do not need to select a shutter speed, ISO, aperture, or frame-blending mode.
What the iPhone Long Exposure Effect Actually Does
Understanding the difference between capture and processing helps you get better results from iPhone long exposure photography. With a conventional interchangeable-lens camera, a photographer might use a slower shutter speed so the sensor records movement continuously during the exposure. The iPhone Live Photo approach is different. Apple records a short sequence of motion and then provides a Long Exposure effect that combines that motion into a still image with visible blur.
Apple describes it as a simulated DSLR-like long exposure effect. Therefore, saying that a Live Photo simply gives you a “three-second shutter speed” is inaccurate. The Live Photo lasts roughly three seconds, but that does not mean the camera sensor is performing one continuous three-second conventional exposure. This distinction also explains why there are no manual iPhone long exposure settings for shutter duration inside the Live Photo effect.
Best Subjects for iPhone Long Exposure Photography
Not every moving subject works equally well. The easiest results usually come from scenes containing predictable movement alongside a stable background.
Flowing water
Water is an excellent place to start.
Try:
- Waterfalls
- Streams
- Fountains
- Waves moving around rocks
- Water flowing through a channel
Keep the surrounding rocks, buildings, plants, or shoreline steady in the composition. The water can become smoother while stationary objects provide visual detail. Avoid expecting every waterfall to become extremely silky. The native effect has limited motion data compared with a dedicated long-duration photography setup.
Moving people
Long exposure can also be used creatively in busy spaces. For example, you can frame a stationary building while pedestrians move through the scene. Their movement may become blurred while the architecture remains more defined. Results depend heavily on how quickly people move and whether they remain in the frame.
Traffic and vehicle lights
Passing cars can produce interesting motion, especially around dusk or at night. However, the native Live Photo effect is limited by its short recorded sequence. If you want long, continuous ribbons of headlights and taillights, a dedicated long exposure camera app for iPhone is generally more flexible.
Spectre, for example, is specifically designed for computational long exposures and advertises features for light trails, moving water, and removing moving subjects. Its current App Store listing says the app can capture long exposures of up to 30 seconds.
How Night Mode Long Exposure on iPhone Is Different
A common source of confusion is treating Night mode long exposure iPhone photography and the Live Photo Long Exposure effect as the same feature.
They are different. On supported iPhones, Night mode activates automatically when the Camera app detects a sufficiently dark scene. Apple says Night mode is available on iPhone 11 and later models and that a capture may take several seconds depending on the available light.
Unlike the Live Photo effect, Night mode actually concerns the low-light capture process. Apple also allows you to adjust between the exposure options available for the current scene. The options vary because the iPhone determines what is appropriate based on conditions and device stability.
When to use Night mode
Choose Night mode when your main goal is:
- A brighter low-light photograph
- More visible detail at night
- A cleaner night cityscape
- A landscape after sunset
- A stationary nighttime scene
Night mode is primarily designed to improve low-light photographs rather than provide the same creative motion-blur effect as Live Photo Long Exposure.
Use a tripod for longer Night mode captures
Stability is especially valuable at night.
Apple recommends keeping the device steady and notes that placing the iPhone on a secure surface or tripod can improve stability and exposure clarity. If the phone moves while Night mode is collecting frames, image quality can decline.
Live Photo Long Exposure vs Night Mode vs Camera Apps
These three methods solve different problems.
| Method | Main Purpose | Exposure Control | Best Uses | Tripod |
| Live Photo + Long Exposure | Simulated motion blur | No manual duration setting | Water, people, simple motion | Helpful but not essential |
| Night mode | Low-light photography | Limited scene-dependent options | Night scenes and low light | Highly useful |
| Dedicated long-exposure app | More creative exposure control | Depends on app | Light trails, extended motion blur, creative effects | Usually recommended |
For someone learning how to take long exposure photos on iPhone, starting with Live Photos makes sense. Move to Night mode when darkness is the main problem and to a dedicated app when the built-in effect becomes too limiting.
How to Use Long Exposure Effect on iPhone Without Camera Shake
Camera movement is one of the biggest reasons a long-exposure image looks disappointing. Before blaming the effect, examine the parts of your photo that were supposed to remain stationary. If buildings, rocks, signs, and other fixed objects are also smeared, camera movement is likely responsible.
Stabilize the phone
A tripod is the most reliable option, but it is not mandatory for every Live Photo.
Without a tripod:
- Hold the phone with two hands.
- Tuck your elbows toward your torso.
- Brace yourself against a solid object.
- Avoid extending your arms far from your body.
- Keep the phone steady briefly after tapping the shutter.
When using longer computational exposure apps, a tripod becomes much more useful because the app may collect frames for substantially longer than a standard Live Photo.
Using a Long Exposure Camera App for iPhone
Once you outgrow Live Photos, third-party apps can provide longer capture durations and specialized motion-blending tools. One current example is Spectre Camera. Its App Store description says it uses computational photography to combine many images and is designed for subjects such as waterfalls and light trails. The current version supports captures up to 30 seconds.
Another current App Store option, Easy Long Exposure Camera, offers Light Trails and Motion Blur blending modes and advertises exposure durations from 1 to 180 seconds plus a Bulb mode. Available features can change with app updates, so check the current listing before choosing an app.
When an app is worth using
Consider a dedicated app when you want:
- Longer traffic light trails
- More pronounced waterfall blur
- Creative light painting
- Extended motion blending
- Greater control over capture duration
- Specialized light-trail or motion-blur modes
Third-party apps do not all work in the same way. Many rely heavily on computational stacking rather than behaving exactly like a traditional camera operating with one extremely long physical exposure. For that reason, check how a specific app handles exposure, stabilization, output formats, and blending before assuming traditional camera rules apply perfectly.
Should You Use an ND Filter?
A neutral-density filter reduces the amount of light entering the camera. With traditional long-exposure photography, that can make slower shutter speeds practical in brighter conditions. For the native Live Photos long exposure iPhone method, however, an ND filter does not extend the duration of the Live Photo or unlock manual shutter-speed control. The built-in effect still works from the recorded Live Photo sequence.
For specialized third-party apps, an ND filter may be useful in some bright scenes, depending on how the app captures and combines frames. Beginners should learn composition, stability, and subject selection before buying additional equipment.
Why the Long Exposure Option May Be Missing
If you open Photos and cannot find Long Exposure, first confirm that the image is actually a Live Photo. Apple’s Long Exposure option appears as one of the effects available for Live Photos.
Check the following:
- The picture was captured with Live Photos enabled.
- You are opening the original Live Photo rather than an exported still image.
- The photo is fully downloaded if it is stored through iCloud.
- A third-party editor has not stripped away Live Photo information.
Apple warns that editing a Live Photo in a third-party app can cause Live Photo effects to be lost. If you are unsure, take a new Live Photo directly in the Camera app and test the effect immediately.
Can You Undo the Long Exposure Effect?
Yes.
Applying Long Exposure to a Live Photo does not mean you are permanently stuck with that appearance. Open the photograph again, tap its Live Photo effect control, and switch to another available state such as Live.
Apple’s current Photos documentation shows that users can switch between Live, Loop, Bounce, Long Exposure, and Live Off where those options apply. That makes experimentation relatively low risk.
A Simple Shooting Workflow for Better Results
When practicing how to do long exposure on iphone, use a repeatable process instead of taking one picture and hoping it works.
- Find a scene containing obvious movement.
- Include stationary objects in the composition.
- Confirm Live Photos is enabled.
- Stabilize the iPhone.
- Capture several versions of the same composition.
- Apply Long Exposure to each.
- Compare which version has the cleanest stationary areas and most attractive motion.
- Reframe or improve stability and repeat if necessary.
Multiple attempts matter because the movement recorded during each Live Photo will be slightly different. A fountain, wave, pedestrian, or passing vehicle may create a better pattern on the second or third attempt.
Common Long Exposure Mistakes
Even though the built-in process is simple, a few mistakes repeatedly weaken results.
Expecting every photo to become dramatic
Long exposure needs movement. A static subject gives the effect very little visual information to work with.
Moving the phone during capture
You want motion in the subject, not the entire frame.
Confusing Night mode with Long Exposure
Night mode is designed primarily for low-light photography. Live Photo Long Exposure is designed to create visible motion blur from a Live Photo.
Expecting manual DSLR-style control
The stock Live Photo effect does not provide manual shutter-speed selection.
Use a specialized app when you need greater control.
Choosing chaotic movement
Predictable motion often works better than random movement. Flowing water, traffic, waves, and people moving consistently through a scene are easier subjects than objects changing direction rapidly.
Frequently Asked Questions
Does the iPhone have a built-in long exposure feature?
Yes, but Apple’s built-in Long Exposure option is a Live Photo effect rather than a conventional manual shutter-speed mode. It simulates a long-exposure look by blurring motion recorded in a Live Photo.
How long does the iPhone Live Photo long exposure last?
A Live Photo records approximately 1.5 seconds before and 1.5 seconds after the picture is taken. However, that should not be interpreted as a traditional three-second shutter exposure, the Long Exposure option is an effect applied to the Live Photo’s recorded motion.
Can I make a normal iPhone photo into a long exposure?
The native Photos method requires Live Photo motion information. An ordinary still image does not contain the sequence needed for Apple’s Live Photo Long Exposure effect.
Why is Long Exposure not showing on my iPhone?
First verify that the image is a genuine Live Photo. Also be aware that editing a Live Photo with third-party software can remove Live Photo effects or associated information.
Do I need a tripod for iPhone long exposure photography?
Not necessarily for the basic Live Photo method, but greater stability generally improves the result. A tripod becomes much more valuable for Night mode and longer captures in specialized apps.
Can I take long-exposure photos at night with an iPhone?
Yes. You can experiment with the Live Photo effect, use Night mode on supported models for multi-second low-light captures, or use a specialized long-exposure app depending on the result you want. Apple says Night mode is available on iPhone 11 and later.
Is Night mode the same as the Long Exposure effect?
No. Night mode is a low-light capture feature that may use several seconds to collect a photograph. Long Exposure is an effect applied to a Live Photo to simulate motion blur.
What is the best subject for a beginner?
Moving water is one of the easiest subjects because the movement is continuous while surrounding rocks, structures, or shorelines can remain stationary. Fountains and small waterfalls are particularly easy places to practice.
Can an iPhone capture long car-light trails?
Yes, but the built-in Live Photo method gives you a relatively short motion sequence. A dedicated app can offer greater flexibility. Spectre, for example, currently supports computational long exposures up to 30 seconds and specifically includes light-trail photography among its intended uses.
What is the best way to learn how to do long exposure on iphone?
Start with Live Photos because the method is already built into the iPhone and requires almost no setup. Practice on moving water while keeping the phone steady. Once you understand how motion and stability affect the result, experiment with Night mode and dedicated long-exposure apps for more specialized shots.